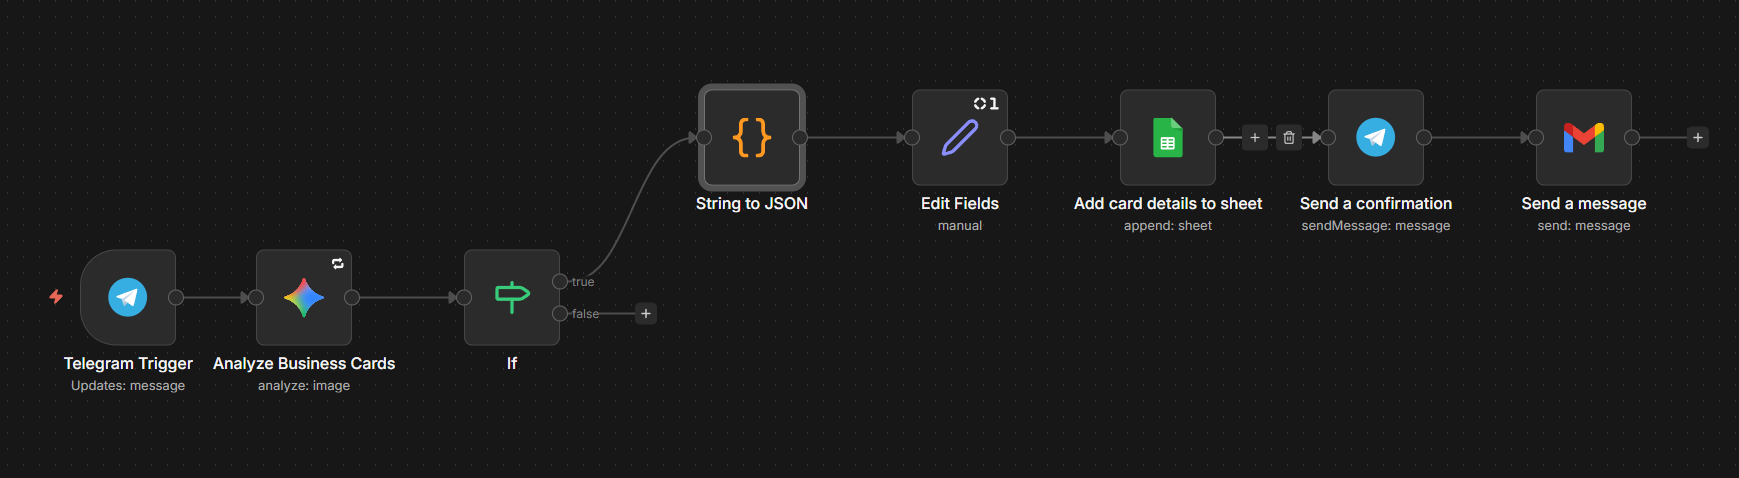
The Big Picture
The goal here is simple: Image in -> Structured Data out. We’re using Telegram as our "scanner," n8n’s AI nodes to do the reading, and Google Sheets/Gmail for the storage and notification.
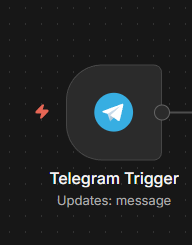
1. The Trigger: Telegram
First, you’ll need a Telegram bot. You can create one in about 30 seconds by talking to @BotFather on Telegram. Once you have your API token, drop the Telegram Trigger node onto your canvas.
- Set the Trigger: Select "Message" as the update type.
- The Workflow Start: Now, whenever you send an image to this bot, the workflow kicks off.
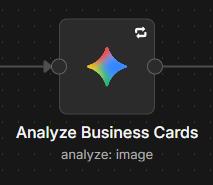
2. The Brains: AI Analysis
This is where the magic happens. We’re using the Analyze Business Cards node (likely powered by an LLM like GPT-4o or Gemini).
Since business cards come in all sorts of messy layouts, a standard OCR usually fails. An AI node, however, understands context. It knows that "CEO" is a title and that the string of numbers starting with "+1" is a phone number.
- Setup: Point this node to the binary image data coming from Telegram.
- Prompting: You don't need much, just tell it to extract the Name, Company, Email, and Phone Number.
You are a data extraction expert. Extract all details from the given business card strictly in the following JSON format:

{
"Name": "<Full Name from the card>",
"Phone Number": "<Primary phone number without any symbols>",
"Secondary phone number": "<Secondary phone numbers separated by commas without symbols>",
"Email ID": "<Primary email address>",
"Secondary Email ID": "<Alternate email address if available, else empty string>",
"Primary_Address": "<Full postal address mentioned first on the card>",
"Primary_City": <City name from the first address mentioned>,
"Primary_State": <State name from the first address mentioned>,
"Primary_Pincode": <Pincode name from the first address mentioned>,
"Secondary_Address": "<Full postal address mentioned second on the card, if mentioned>",
"Secondary_City": <City name from the second address mentioned>,
"Secondary_State": <State name from the second address mentioned>,
"Secondary_Pincode": <Pincode from the second address mentioned>,
"Company Name": "<Company name as mentioned>",
"Brand/Product Name": "<Brands or product names listed, separated by commas>"
}

Guidelines:

1. Include all fields exactly as shown.

2. If any information is missing on the card, return an empty string ("") for that field.

3. Remove all symbols (+, -, spaces, etc.) from phone numbers; only digits remain.

4. Separate multiple secondary phone numbers with commas, with no spaces.

5. Separate multiple brands or product names with commas.

6. Output only the JSON object. DO NOT INCLUDE ANY MARKDOWN formatting or any triple backtick (```). ONLY INLCUDE THE JSON.

7. The output must start directly with { and end with }.

8. Extract data precisely from the card image or provided text.

9. If phone numbers do not have a country code, assume the default country code "91" and prepend it to mobile numbers (not to landline or fax numbers).

10. Ensure the JSON formatting matches the example exactly with no extra spaces or indentation outside field values.

Correct output example:
{
"Name": "Sandra Tucker",
"Phone Number": "91123467890",
"Secondary phone number": "917463820496,914839183758",
"Email ID": "sandra@email.com",
"Secondary Email ID": "",
"Primary_Address": "123 Rd, Near Carlborg Bldg, Colaba, Mumbai, MH, India-400001",
"Primary_City": "Mumbai",
"Primary_State": "MH",
"Primary_Pincode": "400001",
"Secondary_Address": "3rd Floor, A - Wing, Agarwal Trade Center, Office No. 37/38, Sector 11, CBD Belapur, Navi Mumbai, Maharashtra 400614",
"Secondary_City": "Navi Mumbai",
"Secondary_State": "Maharashtra",
"Secondary_Pincode": "400614",
"Company Name": "Tucker Pvt Ltd",
"Brand/Product Name": ""
}
3. The Logic Gate: The "If" Node
Sometimes you might accidentally send a photo of your lunch or a cat meme. The If Node acts as a filter. It checks if the AI actually found valid data. If the "Name" field is empty, the workflow stops. If it’s "True" (we found a card!), we move to the next phase.
Cleaning and Storing the Data
4. String to JSON & Edit Fields
AI output can sometimes be a bit... chatty. We use the String to JSON node to turn that raw text into neat, clickable data fields.
Following that, I like to use an Edit Fields node. This is mostly for housekeeping. I use it to format names (like making sure they are Capitalized Properly) or to add a "Date Added" timestamp.
// Get the raw text from the AI response
let rawText = $input.first().json.candidates[0].content.parts[0].text;

// Clean backticks and markdown formatting, extract JSON content
let cleanText = rawText.replace(/``````$/g, '').trim();

// Find the first '{' and last '}' to handle partial/incomplete JSON
let startIndex = cleanText.indexOf('{');
let endIndex = cleanText.lastIndexOf('}');
let jsonString = '';
if (startIndex !== -1 && endIndex !== -1 && endIndex > startIndex) {
  jsonString = cleanText.substring(startIndex, endIndex + 1);
} else {
  jsonString = cleanText;
}

// Parse the cleaned JSON
let result = JSON.parse(jsonString);

return [{ json: { result: result } }];
5. Google Sheets: The Database
Now we send the data to the Add card details to sheet node.
- Action: Append row.
- Mapping: Link your "Name" field to Column A, "Email" to Column B, and so on.
Self-correction: Make sure your Google Sheet headers match exactly what you’re sending from n8n, or it’ll get grumpy and throw an error.
The "Success" Loop
6. Closing the Circle: Telegram & Gmail
Finally, you want to know it worked without having to open your laptop.
- Send a confirmation (Telegram): I have the bot reply to the original message saying: "Got it! Added [Name] from [Company] to the CRM."
- Send a message (Gmail): This is optional, but I like to have an email copy sent to my inbox as a backup or to remind me to follow up the next morning.
Note: You can download the json file for the workflow from here.
Inspire Others – Share Now
Agentic AI Saksham
India’s Only 1st Ever Offline Hands-on program that adds 4 Global Certificates while making you a real engineer who has built their own AI Agents
EV
Saksham
India’s Only 1st Ever Offline Hands-on program that adds 4 Global Certificates while making you a real engineer who has built their own vehicle
Agentic AI LeadCamp
From AI User to AI Agent Builder — Capabl empowers non-coding professionals to ride the AI wave in just 4 days.
Agentic AI MasterCamp
A complete deployment ready program for Developers, Freelancers & Product Managers to be Agentic AI professionals
.png)